Want to learn how to use a brake bleeder kit to bleed your brakes like a pro? Follow our detailed guide on preparation, attaching the kit, bleeding the brakes, checking for air bubbles, and finishing up for smooth braking performance.
Preparation for Brake Bleeding
Gather Necessary Tools
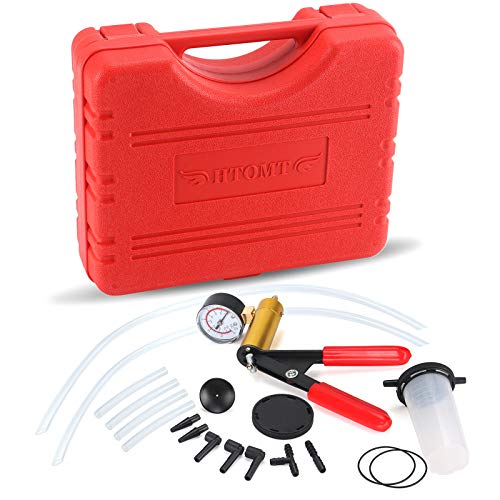
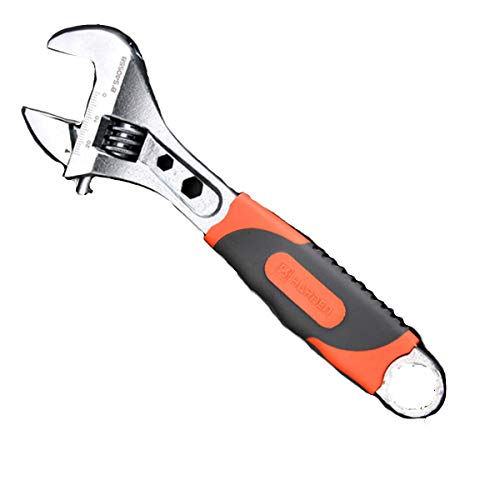
Before you begin the brake bleeding process, it’s important to gather all the necessary tools. You’ll need a few key items to ensure a smooth and successful brake bleeding experience. Make sure you have a brake bleeder kit, a clear tubing, a wrench to fit the bleeder screw, and of course, fresh brake fluid. Having all these tools ready and within reach will save you time and frustration as you work on your brakes.
Lift the Vehicle Safely
Once you have all your tools in hand, it’s time to lift the vehicle safely. Safety should always be your top priority when working on your car, especially when dealing with the braking system. Use a jack and jack stands to elevate the vehicle off the ground, making sure it’s secure and stable before you start the brake bleeding process. This will give you better access to the brake calipers and ensure a safer working environment for you and your helper.
- Check for a solid foundation before lifting the vehicle
- Use jack stands to secure the car in place
- Double-check that the vehicle is stable before starting the brake bleeding process
By following these steps and taking the time to prepare properly, you’ll set yourself up for a successful experience. Remember, safety first!
Attaching the Brake Bleeder Kit
Locate the Brake Bleeder Screw
When attaching the brake bleeder kit, the first step is to locate the brake bleeder screw on the brake caliper. The brake bleeder screw is typically located at the highest point on the caliper to allow air bubbles to escape easily. It is important to identify the correct screw to ensure proper bleeding of the brakes.

Connect the Clear Tubing
Once you have located the brake bleeder screw, the next step is to connect the clear tubing from the brake bleeder kit. The clear tubing will allow you to see any air bubbles or old brake fluid coming out of the brake system. Make sure the tubing is securely attached to the bleeder screw to prevent any leaks during the bleeding process.
- Ensure the clear tubing is long enough to reach a container to catch the old .
- Double-check the connection to prevent any air from entering the brake system.
By following these steps and properly attaching the brake bleeder kit, you will be ready to begin the process smoothly and efficiently. Remember, proper preparation is key to ensuring the success of this maintenance task.
Bleeding the Brakes
Brake bleeding is a critical maintenance task that ensures your brakes are functioning properly and keeping you safe on the road. In this section, we will discuss the importance of having a helper assist you during the bleeding process, as well as the steps involved in opening and closing the bleeder screw.
Have a Helper Assist
Having a helper assist you during the brake bleeding process can make the job much easier and more efficient. Not only does it provide an extra set of hands, but it also allows for better communication and coordination between you and your helper. Before you begin bleeding the brakes, make sure to explain the process to your helper and assign specific tasks to ensure a smooth workflow.
- Ensure your helper understands the importance of following instructions and paying attention to detail.
- Have your helper pump the brake pedal while you open and close the bleeder screw.
- Communicate clearly with your helper to ensure they are providing the necessary assistance throughout the process.
Open and Close the Bleeder Screw
Opening and closing the bleeder screw is a crucial step in the brake bleeding process, as it allows air to escape from the brake system and ensures that only clean brake fluid remains. Here are the steps to properly open and close the bleeder screw:

- Locate the bleeder screw on the brake caliper or wheel cylinder.
- Use a wrench to loosen the bleeder screw, allowing old brake fluid and air to escape.
- Instruct your helper to press the brake pedal, forcing the old fluid out of the system.
- Close the bleeder screw tightly once all air bubbles have been expelled.
- Repeat the process for each wheel until all air has been removed from the brake system.
By following these steps and having a helper assist you, you can effectively bleed your brakes and maintain optimal braking performance. Remember to check the brake fluid level and test drive the vehicle to ensure everything is functioning properly before hitting the road. Brake bleeding may seem like a daunting task, but with the right tools and assistance, you can complete the job with confidence and peace of mind.
Checking for Air Bubbles
Monitor the Clear Tubing
When bleeding the brakes, it’s crucial to keep a close eye on the clear tubing connected to the bleeder screw. This tubing allows you to visually inspect the brake fluid as it flows out of the system. By monitoring the flow of fluid, you can easily spot any air bubbles that may be present in the system. Air bubbles can cause spongy brakes and reduce the overall effectiveness of your braking system.
To monitor the clear tubing effectively, make sure you have adequate lighting in the area. Position yourself in a way that allows you to see the fluid clearly as it travels through the tubing. Look for any bubbles that may appear in the fluid stream. If you notice any air bubbles, it’s essential to continue bleeding the brakes until the fluid runs clear and free of bubbles.
Repeat the Bleeding Process
In some cases, bleeding the brakes once may not be enough to completely remove all air bubbles from the system. If you continue to see air bubbles in the clear tubing after multiple bleeding attempts, it’s crucial to repeat the process until the fluid flows smoothly without any bubbles.
To ensure that all air is removed from the brake lines, repeat the bleeding process as many times as necessary. It’s better to be thorough in this step to avoid any potential issues with your brakes in the future. Remember, safety should always be a top priority when working on your vehicle, and properly bleeding the brakes is essential for maintaining optimal braking performance.
- Keep a close eye on the clear tubing for any air bubbles.
- Repeat the bleeding process if air bubbles are still present.
- Ensure the fluid runs clear and free of bubbles before finishing up.
By carefully monitoring the clear tubing and repeating the bleeding process as needed, you can ensure that your brakes are free of air bubbles and operating at their best. This attention to detail will help keep you safe on the road and maintain the overall health of your vehicle’s braking system. So, don’t overlook this crucial step in the process!
Finishing Up
Check Brake Fluid Level
After bleeding the brakes and ensuring that there are no air bubbles left in the system, it is crucial to check the level to guarantee optimal performance. The reservoir is typically located near the master cylinder under the hood of your vehicle. Here’s how you can check the brake fluid level:
- Inspect the reservoir to see if the level is between the minimum and maximum marks. If it is below the minimum mark, you may need to add more brake fluid.
- Use a flashlight to get a clear view of the fluid level, as it may be challenging to see without proper lighting.
- If the brake fluid appears dirty or contaminated, it is advisable to flush the entire brake system and replace the fluid.
Regularly checking the brake fluid level is essential for maintaining the effectiveness of your braking system and ensuring your safety on the road.
Test Drive the Vehicle
Once you have completed the process and checked the brake fluid level, it is time to test drive your vehicle to ensure that everything is in working order. Testing the brakes after bleeding them is crucial to verify that there are no issues with the braking system. Here are some steps to follow when test driving your vehicle:
- Start the engine and allow it to warm up for a few minutes before driving.
- Drive at a moderate speed in a safe area, such as an empty parking lot or quiet street.
- Apply the brakes gently to test their responsiveness and ensure that the vehicle stops smoothly.
- Pay attention to any unusual noises, vibrations, or difficulty in braking, as these may indicate underlying issues that need to be addressed.
By test driving your vehicle after bleeding the brakes, you can confirm that the braking system is functioning correctly and enjoy peace of mind knowing that you have performed a crucial maintenance task.
Remember, safety should always be your top priority when working on your vehicle’s braking system. If you encounter any difficulties during the brake bleeding process or notice any abnormalities during the test drive, it is recommended to seek professional help to address the issue promptly.