Discover the easy steps to remove car decals at home using tools like a heat gun and adhesive remover. Follow our guide for a clean finish.
Tools Needed for Decal Removal
Heat Gun or Hair Dryer
When it comes to removing decals from your car, having the right tools is essential. One of the most effective you can use is a heat gun or a hair dryer. The heat generated by these helps soften the adhesive that holds the decal in place, making it easier to peel off without causing damage to the surface underneath.
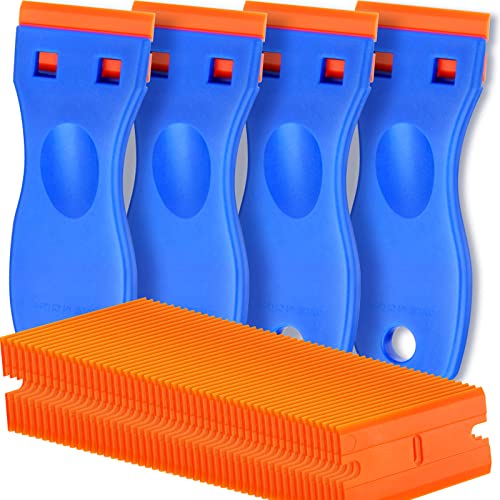
Plastic Razor Blade
In addition to a heat gun or hair dryer, a plastic razor blade is another handy tool to have on hand for decal removal. Unlike metal razor blades, which can scratch or damage the paint on your car, a plastic razor blade is gentle yet effective at scraping off stubborn decals. It allows you to remove the decal without leaving behind any residue or marks.
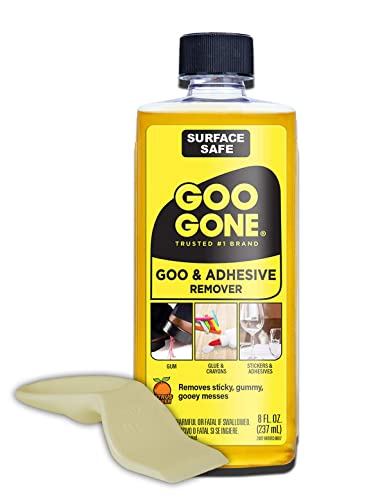
Adhesive Remover
Sometimes, even with the use of heat and a plastic razor blade, there may still be some adhesive residue left behind after removing the decal. This is where an adhesive remover comes in handy. It helps dissolve any leftover adhesive, making it easy to wipe away and leaving your car’s surface clean and smooth.
- Having the right for decal removal is crucial:
- Heat gun or hair dryer for softening the adhesive
- Plastic razor blade for gentle scraping
- Adhesive remover for tackling stubborn residue
With these tools in your arsenal, you’ll be well-equipped to tackle any decal removal job with ease and efficiency.
Preparing the Surface
When it comes to removing decals from your car, the first step is to properly prepare the surface. This is crucial in ensuring that the decal removal process goes smoothly and efficiently.
Wash and Dry the Area
Before you begin removing the decal, it’s important to thoroughly wash and dry the area. This will help to remove any dirt or grime that may be covering the decal, making it easier to work with. Use a gentle car wash soap and a soft sponge to clean the area, ensuring that all debris is removed. Once the area is clean, dry it thoroughly with a microfiber towel to prevent any water spots from forming.
Park the Car in a Shaded Area
After washing and drying the area, it’s best to park your car in a shaded area before starting the decal removal process. This will help to prevent the sun from drying out any products you may use during the removal process, such as adhesive remover. Additionally, working in a shaded area will make it more comfortable for you as you work on removing the decal.
By following these steps to prepare the surface of your car before removing the decal, you’ll set yourself up for success and make the process much easier. Remember, taking the time to properly prepare the surface will ensure a smoother decal removal experience overall.
Removing the Decal
Apply Heat to the Decal
When it comes to removing decals from your car, applying heat is a crucial step. The heat helps soften the adhesive underneath the decal, making it easier to peel off. One of the most effective for this job is a heat gun or a hair dryer. By gently heating the decal, you can loosen the adhesive and prevent any damage to the paintwork underneath. Remember to keep the heat gun or hair dryer at a safe distance to avoid overheating the decal or causing any damage to the car’s surface.
Gently Peel Off the Decal
Once you have applied heat to the decal, it’s time to gently peel it off. Start by picking at a corner of the decal and slowly work your way across, peeling it off bit by bit. Be patient and avoid pulling too hard, as this can cause the decal to tear or leave behind stubborn residue. Using a plastic razor blade can also help in lifting the edges of the decal without damaging the paint.
Use Adhesive Remover for Stubborn Residue
After removing the decal, you may find that there is still some adhesive residue left behind. This is where an adhesive remover comes in handy. Apply the remover to the residue and let it sit for a few minutes to break down the adhesive. Then, using a clean cloth or plastic razor blade, gently rub the residue until it comes off. Be sure to follow the instructions on the adhesive remover to avoid damaging the paintwork.
- Remember to always test the adhesive remover on a small, inconspicuous area of the car before using it on the decal residue.
- Take your time and be gentle when peeling off the decal to avoid damaging the paint underneath.
- If the decal is particularly stubborn, you may need to repeat the heating and peeling process multiple times until it comes off completely.
By following these steps and using the right tools, you can successfully remove decals from your car without causing any damage. Just remember to be patient and take your time to ensure a clean and smooth finish.
Cleaning Up
Remove Any Remaining Adhesive
When removing a decal from your car, it’s common to have some stubborn adhesive residue left behind. This can be frustrating, but with the right tools and techniques, you can easily tackle this issue. One effective method is to use an adhesive remover specifically designed for automotive use. These products are designed to break down and dissolve the adhesive, making it easier to remove.
- Use a clean microfiber cloth to apply the adhesive remover to the affected area.
- Allow the remover to sit for a few minutes to penetrate the adhesive.
- Gently scrub the area with a plastic razor blade or a soft cloth to help lift the adhesive.
- Continue this process until all of the adhesive residue has been removed.
Wash the Area Again
Once you have successfully removed the adhesive residue, it’s important to wash the area again to ensure that all traces of the adhesive remover are gone. Residual chemicals can damage your car’s paint if left on for too long, so it’s crucial to thoroughly clean the area.

- Use a mild automotive detergent and water to wash the affected area.
- Rinse the area thoroughly with clean water to remove any soap residue.
- Dry the area with a clean microfiber cloth to prevent water spots.
Apply Wax or Polish
After you have removed the decal, adhesive residue, and washed the area, it’s a good idea to apply a layer of wax or polish to protect the paint and give it a glossy finish. Waxing or polishing the area can also help blend any remaining imperfections or discoloration caused by the decal.
- Use a high-quality automotive wax or polish to protect the paint.
- Apply the wax or polish in a circular motion, working in small sections at a time.
- Buff the area with a clean microfiber cloth to bring out the shine.
By following these steps to clean up after removing a decal from your car, you can ensure that your vehicle looks its best and remains in top condition. Remember to take your time and be patient, as thorough and protection are key to maintaining your car’s appearance.