Discover effective methods and for removing auto stickers hassle-free. From heating to scraping, say goodbye to sticky residue with these DIY tips.
Tools Needed for Removing Auto Stickers
Heat Gun or Hair Dryer
When it comes to removing stubborn auto stickers, having a heat gun or hair dryer can be a game-changer. The application of heat helps to loosen the adhesive bond between the sticker and the surface, making it much easier to peel off. Simply aim the heat gun or hair dryer at the sticker, moving it back and forth in a sweeping motion. Be cautious not to hold it too close for too long, as excessive heat can damage the paint or surface of your vehicle.
Plastic Razor Blade
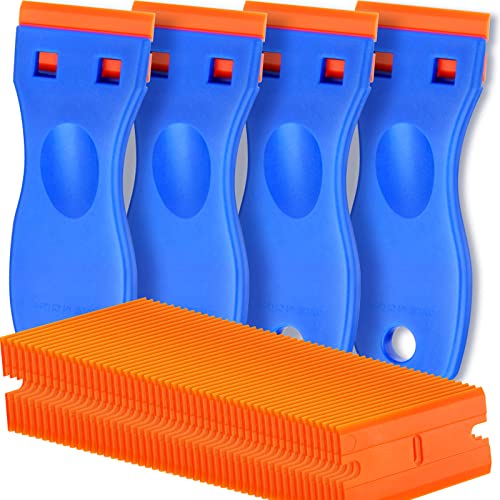
A plastic razor blade is another essential tool for removing auto stickers without causing any damage. Unlike metal razor blades, plastic ones are safe to use on most surfaces without scratching or gouging. Use the plastic razor blade to gently scrape off the sticker, starting at one corner and working your way across. Be patient and take your time to avoid any mishaps.
Goo Gone or WD-40
For sticky residue left behind after removing the sticker, Goo Gone or WD-40 can come to the rescue. These adhesive removers work wonders in breaking down the sticky residue, making it easier to wipe away. Simply apply a small amount of Goo Gone or WD-40 to a clean cloth and gently rub the residue until it dissolves. Remember to wash the area with soap and water afterward to remove any remaining residue.
In summary, having the right for the job is crucial when it comes to removing auto stickers effectively and efficiently. With a heat gun or hair dryer, plastic razor blade, and Goo Gone or WD-40 in your arsenal, you’ll be well-equipped to tackle any sticker removal task that comes your way.

Method 1: Using Heat to Remove Auto Stickers
Heating the Sticker
When it comes to removing stubborn auto stickers, one of the most effective methods is using heat. Heating the sticker helps to loosen the adhesive, making it easier to peel off. To do this, you can use a heat gun or a hair dryer. Simply aim the heat source at the sticker, moving it back and forth to evenly heat the surface. Be careful not to overheat the area, as this can damage the paint on your car.
Peeling Off the Sticker
Once the sticker has been heated, it’s time to peel it off. Start by using your fingernail or a plastic razor blade to lift a corner of the sticker. Slowly peel it back, applying gentle pressure to avoid tearing the sticker. If you encounter resistance, you may need to reapply heat to further loosen the adhesive. Take your time with this step to ensure that the sticker comes off cleanly without leaving behind any residue.
Removing Residue
After the sticker has been removed, you may still be left with some sticky residue on your car. To tackle this, you can use a solvent like Goo Gone or WD-40. Apply a small amount of the solution to a clean cloth and gently rub it onto the residue. Let it sit for a few minutes to allow the solvent to break down the adhesive. Then, wipe off the residue with a clean, damp cloth. Repeat this process as needed until all traces of the sticker are gone.
In summary, using heat to auto stickers is a simple yet effective method that can save you time and frustration. By heating the sticker, peeling it off carefully, and using a solvent to any , you can restore your car’s appearance without causing damage. So next time you’re faced with a stubborn sticker, grab your heat gun and get to work!
Using a Plastic Razor Blade to Remove Auto Stickers
Scraping Off the Sticker
When it comes to removing auto stickers, using a plastic razor blade can be a handy tool. To start the process, carefully slide the plastic razor blade underneath the edge of the sticker. Make sure to apply gentle pressure to avoid damaging the surface of your vehicle. Once you have a good grip on the sticker, slowly and steadily peel it off, taking care not to tear it into smaller pieces.

Removing Stubborn Residue
After successfully removing the sticker, you may notice some stubborn residue left behind on the surface of your car. This is where the plastic razor blade comes in handy once again. Gently scrape off the using the razor blade, being cautious not to scratch or damage the paint. For particularly stubborn residue, you can use a solution of warm, soapy water to help loosen it before scraping.
Cleaning the Area
Once you have removed both the sticker and any leftover residue, it’s important to clean the area thoroughly. Use a clean, soft cloth to wipe down the surface, ensuring that all traces of the sticker and residue are gone. You can also use a mild cleaning solution to help remove any stubborn residue or dirt that may still be present. Finally, give the area a good rinse with water and dry it off completely to reveal a clean and sticker-free surface.
- Remove auto stickers with ease using a plastic razor blade
- Be gentle to avoid damaging the surface
- Use warm, soapy water for stubborn residue
- Clean the area thoroughly after sticker removal
Remember, patience and precision are key when using a plastic razor blade to remove auto stickers. Happy sticker removing!
Method 3: Using Goo Gone or WD-40 to Remove Auto Stickers
Applying the Solution
When it comes to removing stubborn auto stickers, using a product like Goo Gone or WD-40 can be a game-changer. These solutions are specially formulated to break down adhesive residues without damaging the surface of your vehicle. To apply the solution effectively, follow these steps:
- Start by spraying a generous amount of Goo Gone or WD-40 directly onto the sticker you want to . Make sure to cover the entire sticker to ensure maximum effectiveness.
- Allow the solution to sit and penetrate the adhesive for at least 5-10 minutes. This will give it enough time to work its magic and loosen the sticker from the surface of your car.
- Use a clean cloth or rag to gently rub the sticker, applying light pressure as you go. You should start to see the sticker lifting off easily, thanks to the power of the solution.
Letting it Sit
One of the key steps in using Goo Gone or WD-40 to auto stickers is allowing the solution to sit and do its job. This may seem like a simple task, but it is crucial to the success of the removal process. By letting the solution sit for a few minutes, you give it the opportunity to break down the adhesive and make the sticker easier to remove.
As the solution works its way into the sticker, you may notice it starting to bubble or lift off the surface slightly. This is a good sign that the adhesive is being weakened, making it easier for you to wipe off the sticker later on. So, be patient and let the solution work its magic before moving on to the next step.
Wiping Off the Sticker
Once you have allowed the Goo Gone or WD-40 to sit for the recommended time, it’s time to wipe off the sticker. Using a clean cloth or rag, gently start to peel away the sticker from the surface of your car. You may need to apply a bit of pressure, but be careful not to damage the paint or finish of your vehicle.
As you wipe off the sticker, you may notice some residue left behind. This is normal and can easily be cleaned up with a bit more solution and some elbow grease. Simply reapply the Goo Gone or WD-40 to the , let it sit for a few more minutes, and then wipe it away with a clean cloth.
In conclusion, using Goo Gone or WD-40 to remove auto stickers is a simple and effective method that can save you time and frustration. By following these steps and being patient throughout the process, you can easily get rid of those stubborn stickers and have your car looking like new again.