Discover the tools needed, preparation steps, techniques, and finishing touches for removing a dent from your car door with our easy-to-follow guide.
Tools Needed for Dent Removal
Dent Puller
When it comes to removing dents from your vehicle, having the right tools is essential. One of the most common tools used for dent removal is a dent puller. This handy device uses suction to pull the dent out from the inside of the panel, leaving your vehicle looking as good as new. Dent pullers come in a variety of sizes and shapes, so be sure to choose one that is appropriate for the size of the dent you are trying to remove.
Heat Gun
Another tool that is often used in dent removal is a heat gun. By applying heat to the dent, you can soften the metal and make it easier to manipulate. This can be especially useful for dents that are located in hard-to-reach areas or have sharp creases. However, it is important to use caution when using a heat gun, as too much heat can damage the paint on your vehicle.
Rubber Mallet
In some cases, a dent may be too severe to be removed with just a dent puller or heat gun. In these instances, a rubber mallet can be a useful tool for gently tapping out the dent from the outside. The soft rubber material of the mallet helps to protect the surrounding paint while still providing enough force to reshape the metal. Just be sure to use a light touch and work slowly to avoid causing further damage to your vehicle.
Preparing the Area for Dent Removal
Clean the Surface
Before beginning the dent removal process, it is crucial to ensure that the surface around the dent is clean and free of any debris. Cleaning the surface not only allows for better visibility of the dent but also prevents any dirt or grime from getting into the dent during the repair process.

To clean the surface effectively, start by washing the area with a mild soap and water solution. Use a soft cloth or sponge to gently scrub the surface, making sure to remove any dirt or grease buildup. Once the surface is clean, dry it thoroughly with a clean towel before moving on to the next step.
- Inspect the surface for any remaining debris
- Use a microfiber cloth to wipe down the area
- Avoid using harsh chemicals that may damage the paint
Apply Heat
Applying heat to the dent is a common technique used to help soften the metal and make it more malleable for the repair process. Heat can be applied using a heat gun, which emits a controlled stream of hot air that can be directed onto the dent. Alternatively, a hairdryer can also be used to apply heat to the affected area.
To apply heat effectively, hold the heat gun or hairdryer a few inches away from the dent and move it in a circular motion to evenly distribute the heat. Be careful not to overheat the area, as this can cause damage to the paint or surrounding materials. Once the metal is heated, it will become more flexible and easier to manipulate during the dent removal process.
- Test the heat gun on a small, inconspicuous area first
- Use heat-resistant gloves to protect your hands
- Avoid applying heat for an extended period to prevent damage
Protect Surrounding Paint
While preparing the area for dent removal, it is essential to take precautions to protect the surrounding paint from any potential damage. The heat and pressure applied during the dent removal process can sometimes cause the paint to chip or peel, so it is important to safeguard it beforehand.
One way to protect the surrounding paint is to use masking tape to create a barrier between the dent and the painted surface. Apply the masking tape carefully around the edges of the dent, making sure to leave a small gap between the tape and the dent itself. This will help prevent any accidental damage to the paint while you work on removing the dent.
- Use high-quality masking tape to ensure a clean removal
- Remove the tape carefully once the dent removal process is complete
- Inspect the painted surface for any signs of damage before proceeding
By following these steps to prepare the area for dent removal, you can ensure a successful and smooth repair process without causing any additional damage to the surrounding paint or materials. Remember to take your time and work carefully to achieve the best results.
Techniques for Pulling Out the Dent
Using a Dent Puller
When it comes to removing a dent from your vehicle, using a dent puller can be a highly effective method. A dent puller is a tool specifically designed to pull out dents by creating suction between the tool and the surface of the car. This tool works by attaching the puller to the dent and then pulling on it to gradually pop the dent out. It is important to ensure that the surface is clean and free of any debris before using a dent puller to prevent any damage to the paint.
To use a dent puller effectively, follow these steps:
- Clean the surface of the dent thoroughly using a mild soap and water to remove any dirt or grime that may be present.
- Attach the dent puller to the center of the dent and make sure it is securely in place.
- Slowly begin to pull on the , applying steady pressure until the dent pops out.
- Once the dent has been removed, gently sand down any rough edges or imperfections to smooth out the area.
- Finally, apply a touch-up paint to the area to match the surrounding paint and protect the exposed metal from rusting.
Using a dent puller is a simple and efficient way to remove dents from your vehicle without causing any further damage. With the right technique and a bit of patience, you can restore your car’s appearance and maintain its value.
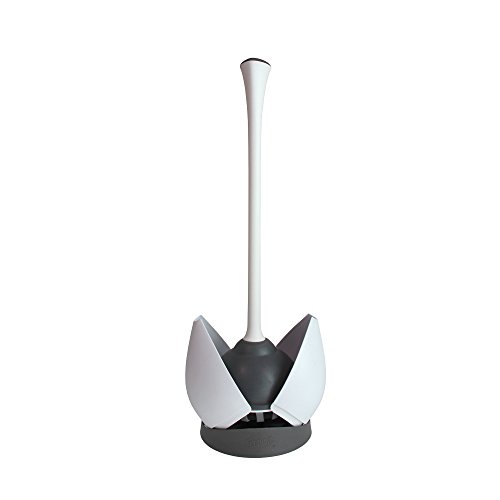
Using a Plunger
Believe it or not, a household plunger can also be a useful tool for pulling out dents from your car. While it may seem unconventional, the suction power of a plunger can actually help to pop out shallow dents without the need for expensive tools or professional assistance. This method works best on larger, flat surfaces where the plunger can create a strong seal.

To use a plunger to remove a dent from your car, follow these steps:
- Ensure that the surface of the dent is clean and free of any debris.
- Place the plunger over the center of the dent and press down firmly to create a tight seal.
- Slowly pull on the plunger, using steady pressure to gradually pop the dent out.
- If the dent does not pop out on the first try, repeat the process until the dent is fully removed.
- Once the dent has been pulled out, smooth out any rough edges and apply a touch-up paint to finish the job.
Using a plunger to remove a dent may seem unconventional, but it can be a cost-effective and efficient solution for small dents on your vehicle. With a bit of elbow grease and the right technique, you can achieve professional-looking results without breaking the bank.
Using Hot Water
Another DIY method for removing dents from your car is by using hot water to help reshape the metal. This technique is best suited for dents that are shallow and have not caused any paint damage. The hot water helps to soften the metal, making it easier to manipulate and pop back into place.
To use hot water to remove a dent from your car, follow these steps:
- Heat a pot of water on the stove until it is hot but not boiling.
- Carefully pour the hot water over the dent, focusing on the center to soften the metal.
- Use a rubber mallet or your hand to gently push the dent out from the inside.
- Continue to apply hot water and manipulate the metal until the dent is fully removed.
- Once the dent has been popped out, smooth out any imperfections and apply a touch-up paint to blend the area with the rest of the car.
Using hot water to remove dents can be a simple and effective method for minor dents on your vehicle. By softening the metal and reshaping it from the inside, you can restore your car’s appearance and maintain its value without the need for professional help.

Finishing Touches
When it comes to finishing touches after removing a dent from your car, there are a few key steps to ensure a seamless repair that blends in perfectly with the rest of your vehicle. Let’s dive into the final touches that will leave your car looking as good as new.
Smooth Out the Area
After successfully pulling out the dent, the next step is to smooth out the area to eliminate any remaining imperfections. This can be done using a fine-grit sandpaper to gently sand down any rough edges or high spots. Take care to blend the sanded area with the surrounding paint for a seamless finish.
Apply Touch-Up Paint
Once the area is smooth, it’s time to apply touch-up paint to cover any exposed metal and ensure that the repaired area matches the rest of the car’s paint. Choose a paint color that matches your vehicle’s paint code and carefully apply thin layers of paint using a small brush. Allow each layer to dry completely before applying the next to achieve a professional-looking finish.
Wax the Surface
To protect the newly repaired area and give your car a glossy finish, it’s essential to wax the surface. Waxing not only enhances the appearance of your vehicle but also provides a layer of protection against environmental elements. Choose a high-quality car wax and apply it using a soft cloth in circular motions. Buff the wax off once it has dried to reveal a shiny, polished surface.
In conclusion, the finishing touches are crucial in completing the dent removal process and restoring your car’s appearance. By smoothing out the area, applying touch-up paint, and waxing the surface, you can achieve a flawless finish that will make your car look as good as new. Follow these steps carefully to ensure a professional-looking result that you can be proud of.
