Discover the tools needed and step-by-step instructions for measuring a tire’s diameter, tread depth, width, aspect ratio, and inflation pressure.
Tools Needed for Measuring a Tire
Tape Measure
When it comes to measuring a tire, one of the essential tools you’ll need is a tape measure. This handy tool allows you to accurately determine the diameter and width of your tire, giving you important information about its size and fit. Make sure you have a flexible tape measure that can wrap around the tire easily and provide precise measurements.
- Ensure the tape measure is long enough to reach across the entire width of the tire.
- Use a tape measure with clear markings for accurate readings.
- Keep the tape measure straight and taut when measuring to avoid any errors in your calculations.
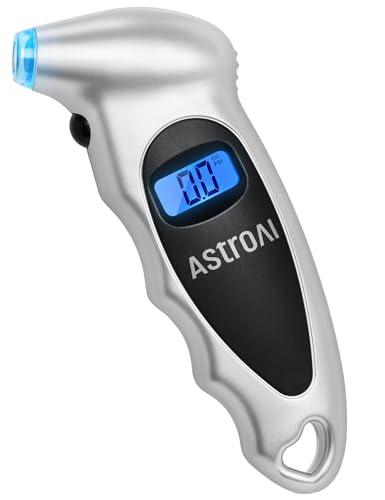
Tire Gauge
Another crucial tool for measuring a tire is a tire gauge. This device allows you to check the inflation pressure of your tires, ensuring they are properly inflated for optimal performance and safety. A tire gauge is easy to use and provides accurate readings that can help you avoid issues like uneven wear and decreased fuel efficiency.
- Choose a digital or analog tire gauge based on your preference.
- Check the manufacturer’s recommendations for the ideal tire pressure.
- Regularly use a tire gauge to monitor and adjust your tire pressure as needed.
Chalk
Chalk may seem like an unexpected tool for measuring a tire, but it can actually be quite handy. By marking the tire with chalk before taking measurements, you can easily keep track of where you’ve measured and avoid any confusion or mistakes. Chalk is also useful for marking wear indicators or areas of concern on the tire, helping you identify any potential issues that may need attention.
- Use a brightly colored chalk that is easy to see against the tire’s surface.
- Mark the valve stem position with chalk to ensure accurate measurements.
- Wipe off the chalk markings after you’re done measuring to keep your tires clean and free from residue.
Step-by-Step Guide to Measure Tire Diameter
Mark the Valve Stem Position
When measuring the diameter of a tire, it is essential to start by marking the valve stem position. The valve stem is the small protrusion on the wheel where you inflate the tire. By marking this position, you will have a reference point for your measurements, ensuring accuracy and consistency throughout the process.
Measure the Distance Across the Tire
Next, take a tape measure and measure the distance across the tire from one end to the other. Make sure to place the tape measure in the center of the tire and extend it all the way to the opposite side. This measurement will give you the overall width of the tire, which is crucial for calculating the diameter accurately.
Calculate the Diameter
To calculate the diameter of the tire, you will need to use a simple formula. The diameter is equal to the width of the tire multiplied by 2, plus the diameter of the wheel. For example, if the width of the tire is 8 inches and the wheel diameter is 15 inches, the total diameter of the tire would be 31 inches (8 * 2 + 15 = 31).
How to Measure Tire Tread Depth
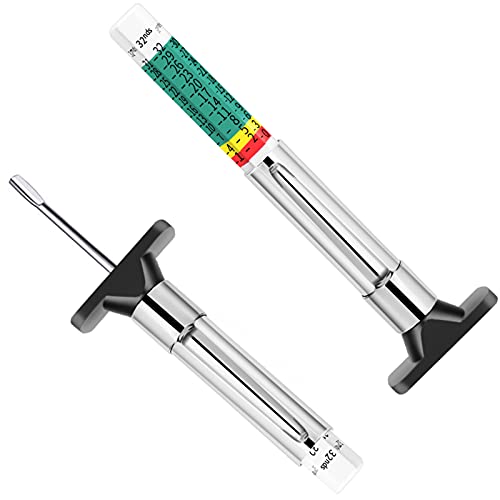
Use a Tread Depth Gauge
When it comes to measuring tire , using a tread depth gauge is essential. This handy tool allows you to accurately measure the depth of the tread on your tires, giving you valuable information about their condition. Tread depth gauges are easy to use and can provide you with precise measurements, helping you determine if your tires are worn out and in need of replacement.
- Make sure to position the tread depth gauge perpendicular to the tire surface for accurate readings.
- Place the gauge into the tread groove and press down firmly to ensure it reaches the bottom.
- Read the measurement displayed on the gauge to determine the depth of the tread.
Using a tread depth gauge is a simple yet effective way to keep track of the condition of your tires and ensure they are safe to use on the road. By regularly measuring the tread depth, you can identify any signs of wear and take appropriate action to maintain the performance and safety of your vehicle.
Measure at Multiple Points
When measuring tire , it’s important to measure at multiple points across the tire to get a comprehensive view of its condition. Tires can wear unevenly, with certain areas experiencing more wear than others. By measuring at multiple points, you can identify any inconsistencies in the and address them accordingly.
- Divide the tire into sections and measure the tread depth at various points within each section.
- Pay close attention to the outer edges, center, and shoulder of the tire, as these areas tend to wear out faster.
- Compare the measurements taken at different points to determine if there are any significant differences in tread depth.
Measuring at multiple points gives you a more accurate representation of the overall condition of your tires and helps you identify any potential issues that may need to be addressed. By being thorough in your measurements, you can ensure that your tires are in optimal condition for safe driving.
Check for Wear Indicators
In addition to using a gauge and measuring at multiple points, it’s important to check for wear indicators on your tires. Wear indicators are small bars or bands located in the grooves of the tire tread, designed to show when the tread has worn down to a certain level. These indicators serve as a visual cue that it’s time to replace your tires.
- Look for raised bars or bands within the tread grooves that indicate the minimum allowable tread depth.
- If the tread wear indicator bars are flush with the surrounding tread, it’s a sign that the tire has reached the end of its usable life.
- Replace tires that have worn down to the level of the wear indicators to ensure optimal traction and safety on the road.
Checking for wear indicators is a quick and easy way to determine if your tires are in need of replacement. By paying attention to these visual cues, you can stay ahead of tire wear and maintain the performance and safety of your vehicle.
Determining Tire Width and Aspect Ratio
When it comes to determining the width and aspect ratio of a tire, there are a few key steps you need to follow. Let’s break it down into three main components: measuring the width across the tread, calculating the aspect ratio, and understanding tire size markings.
Measure the Width Across the Tread
To accurately measure the width of a tire, you’ll need to focus on the tread area. Grab a tape measure and place it across the center of the tire’s tread. Make sure the tape measure is perpendicular to the direction of the tread for an accurate measurement. Take note of the measurement in millimeters for the most precise result.

Calculate the Aspect Ratio
The aspect ratio of a tire is a crucial factor in understanding its overall dimensions. To calculate the aspect ratio, you’ll need to divide the height of the tire’s sidewall by the width of the tire. This calculation is typically expressed as a percentage. For example, if a tire has a sidewall height of 50mm and a width of 200mm, the aspect ratio would be 50/200 = 0.25 or 25%.
Understanding Tire Size Markings
Tire size markings can sometimes be confusing, but they contain valuable information about the tire’s dimensions. Look for markings on the sidewall of the tire that indicate the width, aspect ratio, and diameter. These markings are usually displayed in a format like “195/65R15”, where 195 represents the width in millimeters, 65 is the aspect ratio, and 15 is the diameter in inches.
In summary, measuring the width across the tread, calculating the aspect ratio, and understanding tire size markings are essential steps in determining the dimensions of a tire. By following these guidelines, you’ll have a better grasp of the size and proportions of your tires, helping you make informed decisions when it comes to maintenance and replacement.
Measuring Tire Inflation Pressure
When it comes to ensuring the optimal performance and longevity of your tires, measuring tire inflation pressure is crucial. Proper tire inflation not only improves fuel efficiency but also enhances handling and safety on the road. In this section, we will discuss the importance of using a tire pressure gauge, checking manufacturer’s recommendations, and knowing when to inflate or deflate your tires.
Use a Tire Pressure Gauge
One of the essential tools needed for measuring tire inflation pressure is a tire pressure gauge. This simple yet effective device allows you to accurately measure the air pressure inside your tires. Using a tire pressure gauge is easy – simply remove the valve cap from the tire, press the gauge onto the valve stem, and read the pressure displayed on the gauge. It’s important to check your tire pressure regularly, at least once a month, to ensure that it is at the recommended level.
Check Manufacturer’s Recommendations
Every vehicle comes with specific manufacturer recommendations for tire inflation pressure. These recommendations can usually be found in the owner’s manual or on a sticker located on the driver’s side door jamb. It’s important to follow these guidelines to ensure that your tires are inflated to the correct pressure. Overinflated tires can lead to uneven wear and reduced traction, while underinflated tires can result in poor fuel efficiency and increased risk of blowouts. By adhering to the manufacturer’s recommendations, you can help prolong the life of your tires and maintain optimal performance.
Inflate or Deflate as Needed
Once you have measured the tire inflation pressure using a tire pressure gauge and checked the manufacturer’s recommendations, you may need to adjust the pressure accordingly. If the pressure is too low, you will need to inflate the tire using an air compressor. On the other hand, if the pressure is too high, you will need to deflate the tire by releasing some air. It’s important to make these adjustments carefully and in small increments to avoid overinflation or underinflation. Remember to recheck the pressure after making any adjustments to ensure that it falls within the recommended range.
In conclusion, measuring tire inflation pressure is a simple yet essential task that should not be overlooked. By using a tire pressure gauge, checking manufacturer’s recommendations, and inflating or deflating your tires as needed, you can ensure that your tires are in optimal condition for safe and efficient driving. Make it a habit to regularly check your tire pressure and make any necessary adjustments – your tires will thank you for it in the long run.