Discover the ins and outs of building a sleeper PC for gaming, from understanding the components to customizing with LED lighting and common issues.
Understanding Sleeper Builds
Definition and Purpose
When it comes to building a computer, the term “sleeper build” may not be familiar to everyone. A sleeper build refers to a PC that may not look flashy or high-end on the outside, but packs a powerful punch on the inside. It’s like a wolf in sheep’s clothing, blending in with the crowd but capable of outperforming its competitors. The purpose of a sleeper build is to create a machine that excels in performance without drawing attention to itself based on looks alone.
Benefits of Sleeper Builds
There are several benefits to opting for a sleeper build for your next PC project. One of the main advantages is cost-effectiveness. By focusing on performance rather than aesthetics, you can save money on flashy cases and RGB lighting, investing instead in high-quality that enhance the overall speed and efficiency of your computer. Additionally, sleeper builds offer a unique sense of satisfaction – knowing that your unassuming PC is a powerhouse under the hood can be incredibly rewarding. Finally, sleeper builds are a great conversation starter for tech enthusiasts who appreciate the beauty of function over form.
- Inexpensive yet powerful components
- Unique sense of satisfaction
- Great conversation starter for tech enthusiasts
By understanding the definition and purpose of sleeper builds, as well as the benefits they offer, you can make an informed decision on whether this type of PC project is right for you.
Researching Sleeper Build Components
Compatible Motherboard Options
When it comes to building a sleeper PC, one of the most crucial decisions you’ll need to make is choosing the right motherboard. The motherboard acts as the foundation for your entire build, determining what components you can use and how they will interact with each other.

To ensure compatibility with your chosen components, it’s essential to research and select a motherboard that meets your needs. Consider factors such as the size of the motherboard (ATX, micro-ATX, mini-ITX), the socket type for the processor, the number of RAM slots available, and the connectivity options (USB ports, SATA ports, PCIe slots).
- Some popular motherboard brands to consider are:
- ASUS
- MSI
- Gigabyte
- ASRock
Researching and comparing different motherboard options will help you find the perfect match for your sleeper build, ensuring seamless performance and compatibility with your chosen components.
Choosing the Right Processor
The processor, also known as the CPU, is the brain of your computer and plays a significant role in determining its overall performance. When selecting a processor for your sleeper build, consider factors such as the number of cores, clock speed, cache size, and power consumption.
- Popular processor brands to consider include:
- Intel
- AMD
Research different processor options within your budget range and compare their performance benchmarks to find the best fit for your needs. Whether you’re a casual user or a hardcore gamer, choosing the right processor is essential for achieving optimal performance in your sleeper build.
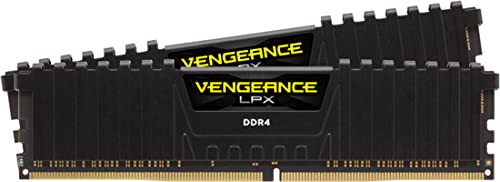
Selecting Suitable RAM
RAM, or random access memory, is another critical component to consider when building a sleeper PC. The amount and speed of RAM you choose will directly impact the performance and multitasking capabilities of your computer.

- Consider these factors when selecting RAM:
- Capacity (measured in gigabytes)
- Speed (measured in MHz)
- Compatibility with motherboard
Research different RAM options available on the market and choose a suitable option based on your budget and performance requirements. Upgrading your RAM can significantly improve the overall speed and responsiveness of your sleeper build, making it a worthwhile investment in the long run.
Building a Sleeper PC
Organizing Components
When it comes to building a sleeper PC, one of the first things you’ll need to do is organize all the components you’ll be using. This includes the motherboard, processor, RAM, graphics card, power supply, and any other peripherals you may want to include.
To keep things organized, consider creating a checklist of all the components you need and setting them out in a clear, spacious area. This will not only make the building process easier but also help you keep track of everything you have and need.
Installing the Motherboard
The motherboard is essentially the backbone of your PC, so it’s crucial to install it correctly. Start by carefully placing the motherboard into the case, ensuring that it lines up with the standoffs on the case. Once in place, secure the motherboard using the screws provided, being careful not to overtighten them.
Next, you’ll need to connect the various to the motherboard, such as the CPU, RAM, and graphics card. Refer to the motherboard’s manual for specific instructions on where to connect each component. Take your time with this step, as a properly installed motherboard is essential for the overall performance of your PC.
Connecting Power Supply
After the motherboard is securely in place, it’s time to connect the power supply. Start by locating the main power connector on the motherboard, usually a large 24-pin plug. Connect this to the corresponding power supply cable, ensuring it clicks into place.
Next, connect any additional power cables needed for your components, such as the CPU power connector and GPU power connectors. Make sure to route the cables neatly to avoid any obstructions or airflow restrictions within the case.
Once all the components are connected to the power supply, it’s time to plug in the power cord and turn on your sleeper PC for the first time. Double-check all connections before powering up to avoid any potential issues.
Building a sleeper PC can be a rewarding experience, and with the right organization and attention to detail, you can create a powerful and unique system that reflects your personal style and preferences. Happy building!
Customizing Your Sleeper Build
Adding LED Lighting
When it comes to customizing your sleeper build, adding LED lighting can really take your PC to the next level. Not only does it add a cool aesthetic to your setup, but it also helps to showcase your unique style and personality. There are various options available when it comes to LED lighting, from simple strips that can be easily installed to more advanced RGB lighting systems that allow you to customize the color and effects.

- Consider the placement of the LED lighting to ensure that it highlights the key components of your build.
- Experiment with different color combinations and effects to create a visually appealing setup.
- Make sure to choose LED lighting that is compatible with your motherboard and other to avoid any compatibility issues.
Installing Additional Cooling
One of the key aspects of customizing your sleeper build is ensuring that it stays cool under heavy usage. Installing additional cooling solutions can help to improve the overall performance and longevity of your PC. There are various options available when it comes to cooling, from air coolers to liquid cooling systems, each with its own benefits and drawbacks.
- Research the different cooling solutions available and choose one that best suits your needs and budget.
- Make sure to properly install the cooling system to ensure optimal performance and efficiency.
- Regularly clean and maintain the cooling system to prevent dust buildup and overheating issues.
Cable Management Tips
Proper cable management is often overlooked but plays a crucial role in the overall aesthetics and functionality of your sleeper build. Messy cables not only look unappealing but can also affect airflow and cause performance issues. By following some simple cable management tips, you can keep your setup clean and organized.
- Use cable ties or Velcro straps to bundle and organize cables neatly.
- Route cables behind the motherboard tray or through designated cable management channels to minimize visibility.
- Consider investing in cable management accessories such as cable combs or sleeves to further enhance the look of your build.
Testing and Troubleshooting
Running Diagnostic Software
When it comes to building your own sleeper PC, one of the crucial steps in ensuring everything is running smoothly is running diagnostic software. This software is designed to analyze your system’s performance, detect any potential issues, and provide valuable insights into how to optimize your build. By running diagnostic software, you can identify any bottlenecks or problems that may be affecting your PC’s performance.
- To begin, you can use popular diagnostic tools such as CPU-Z and GPU-Z to monitor the performance of your processor and graphics card. These tools provide detailed information about the components in your system, including clock speeds, temperatures, and voltages.
- Another useful tool is Prime95, which is a stress-testing program that can help you determine the stability of your CPU under heavy workloads. Running Prime95 for an extended period can reveal any potential issues with your CPU, such as overheating or instability.
- Additionally, MemTest86 is a great tool for testing the stability of your RAM. By running MemTest86, you can identify any faulty memory modules that may be causing crashes or system errors.
Checking for Compatibility Issues
Compatibility issues can often arise when building a custom PC, especially if you are using components from different manufacturers or generations. It is essential to check for compatibility issues before assembling your sleeper build to avoid any potential headaches down the line.

- Make sure to consult the motherboard’s manual to ensure that all components, such as the processor, RAM, and graphics card, are compatible with the motherboard.
- Check the power supply unit (PSU) to ensure that it can provide enough power for all components in your build. Using a PSU calculator can help you determine the wattage needed for your system.
- Verify that the case you have chosen can accommodate all the components you plan to install, including the motherboard size, graphics card length, and cooling solutions.
Troubleshooting Common Problems
Even with careful planning and testing, issues can still arise when building a sleeper PC. Troubleshooting common problems is an essential skill that every PC builder should have to ensure their system runs smoothly.
- If your PC fails to boot up, check the power connections to ensure everything is properly plugged in. Also, verify that the power switch on the PSU is turned on.
- If you encounter blue screen errors or system crashes, it could indicate a hardware or software issue. Updating drivers, checking for overheating components, and running system diagnostics can help pinpoint the problem.
- In case of overheating, make sure that all fans are working correctly, and airflow in the case is optimized. Adding additional cooling solutions, such as aftermarket CPU coolers or case fans, can help reduce temperatures.
By following these testing and steps, you can ensure that your sleeper build performs optimally and troubleshoot any issues that may arise along the way. Remember to stay patient and persistent when diagnosing problems, as the solution is often just a few steps away.