Want to make your rims shine like new? Follow our comprehensive guide on cleaning brake dust off rims using the right tools and techniques.
Tools and Materials Needed
Soft-bristled Brush
When it comes to cleaning your rims, having the right tools is essential. A soft-bristled brush is perfect for gently scrubbing away dirt and grime without causing any damage to the surface of your rims. Look for a brush specifically designed for cleaning wheels to ensure that you get the best results without scratching or harming the finish.
Wheel Cleaner
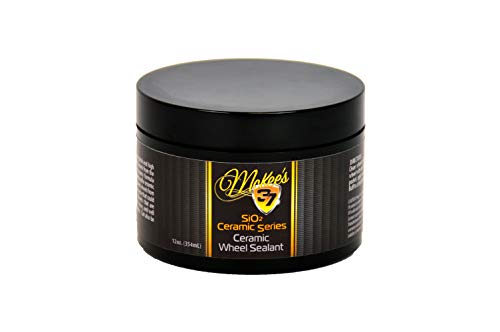
Another important tool for cleaning your rims is a high-quality wheel cleaner. This specially formulated cleaner is designed to break down brake dust, road grime, and other tough-to-remove substances that can build up on your rims over time. Choose a cleaner that is safe for your specific type of rims to ensure that you get the best results without causing any damage.
Microfiber Cloth
A microfiber cloth is a must-have for finishing touches when cleaning your rims. This soft and absorbent cloth is perfect for drying your rims after cleaning and for applying any final touches, such as wheel wax. The gentle material of a microfiber cloth helps to prevent scratching and ensures a streak-free finish that will leave your rims looking their best.
- Always use a separate cloth for cleaning your rims to avoid transferring dirt or grime from other parts of your vehicle.
- Wash your microfiber cloth regularly to keep it clean and effective for future use.
- Consider investing in multiple microfiber cloths to ensure that you always have a clean one on hand for your rim cleaning routine.
Preparing the Rim
Rinse the Rim
Before starting the cleaning process, it’s essential to rinse off any loose dirt and debris from the rim. This initial step will make it easier to remove stubborn grime later on. Use a hose or bucket of water to thoroughly rinse the rim, paying extra attention to the crevices where dirt tends to accumulate.

Remove Hubcaps (if applicable)
If your vehicle has hubcaps covering the rims, it’s important to remove them before proceeding with the cleaning process. Hubcaps can trap dirt and brake dust, making it difficult to clean the rims effectively. Carefully remove the hubcaps and set them aside in a safe place until the cleaning is complete.
Now that the rim is rinsed and the hubcaps are removed, you’re ready to move on to the next step in achieving sparkling clean rims. Let’s dive into the cleaning process to bring out the shine in your wheels.
- Rinse off loose dirt and debris from the rim
- Remove any hubcaps covering the rims
Cleaning Process
Apply Wheel Cleaner
When it comes to cleaning your rims, the first step is to apply a high-quality wheel cleaner. This will help to break down and dissolve any built-up grime, brake dust, and dirt that has accumulated on the surface of your rims. Make sure to choose a wheel cleaner that is safe for your specific type of rims, whether they are aluminum, chrome, or painted.
Scrub the Rim
Once you have applied the wheel cleaner, it’s time to get scrubbing. Grab a soft-bristled brush and gently scrub the entire surface of the rim. Pay close attention to the spokes, crevices, and any other hard-to-reach areas where dirt and brake dust tend to hide. The gentle scrubbing action will help to loosen and remove any stubborn residue, leaving your rims looking clean and shiny.
Rinse Thoroughly
After you have thoroughly scrubbed the rim, it’s essential to rinse off all traces of the wheel cleaner. Use a hose or bucket of water to rinse the rim, making sure to remove any remaining cleaner and dirt. It’s crucial to rinse thoroughly to prevent any residue from drying on the rim, which could leave streaks or water spots behind. Once you have rinsed the rim, take a step back and admire your handiwork – your rims should now be sparkling clean and ready to hit the road.
Remember, regular cleaning and maintenance of your rims will not only keep them looking great but also help to prolong their lifespan. By following these simple steps and using the right tools and products, you can ensure that your rims stay in top condition for years to come. So, go ahead and give your rims the TLC they deserve – they’ll thank you for it with a sleek and stylish appearance on your vehicle.
Dealing with Stubborn Brake Dust
Use a Stronger Cleaner
When it comes to tackling stubborn brake dust on your rims, sometimes a regular just won’t cut it. In these cases, it’s important to turn to a stronger cleaner to effectively remove the built-up grime. Look for a cleaner specifically designed to break down brake dust and other tough contaminants. These cleaners are formulated with powerful ingredients that can penetrate and dissolve even the most stubborn deposits, leaving your rims looking clean and shiny.
One popular option is a citrus-based cleaner, which is known for its strong cleaning properties and pleasant scent. Simply spray the cleaner onto the affected areas of your rims, making sure to cover all the brake dust buildup. Allow the cleaner to sit for a few minutes to penetrate the grime before agitating it with a soft-bristled brush or brush.
Use a Wheel Cleaner Brush
In addition to using a stronger cleaner, employing the right tools can also make a big difference in removing stubborn brake dust. A wheel cleaner brush is specifically designed to clean the intricate details and crevices of your rims, where brake dust tends to accumulate. These brushes typically feature soft bristles that are gentle on your rims but effective at loosening and lifting dirt and grime.
When using a wheel cleaner brush, start by applying the cleaner to the rim and then gently scrubbing the surface with the brush. Pay special attention to areas around the spokes, lug nuts, and any other hard-to-reach areas where brake dust may be hiding. The brush’s bristles will help dislodge the dirt and debris, making it easier to rinse away and reveal a sparkling clean finish.

By combining a stronger cleaner with the right tools like a wheel cleaner brush, you can effectively tackle even the most stubborn brake dust on your rims. With a little extra effort and the proper products, you can restore your wheels to their original glory and turn heads wherever you go. Remember, a clean set of rims not only enhances the appearance of your vehicle but also prolongs the lifespan of your wheels. So don’t let stubborn brake dust get the best of you – fight back with the right cleaner and brush for a showroom-worthy shine.
Drying and Finishing Touches
Dry the Rim
After completing the cleaning process, it is crucial to ensure that the rim is completely dry before moving on to the next step. Using a clean microfiber cloth, carefully dry the rim, making sure to remove any remaining water droplets. This step not only helps to prevent water spots from forming on the rim but also allows you to inspect the surface for any missed spots or stubborn brake dust that may require additional attention.
Apply Wheel Wax (optional)
Once the rim is dry and free of any debris, you have the option to apply wheel wax for an added layer of protection and shine. Wheel wax serves as a barrier against dirt, brake dust, and other contaminants, making it easier to clean your rims in the future. Additionally, it can enhance the overall appearance of the rim, giving it a glossy finish that will surely turn heads.
- To apply wheel wax, start by using a clean applicator pad or cloth.
- Apply a small amount of wax onto the pad and work it into the rim in a circular motion.
- Make sure to cover the entire surface of the rim, including any intricate details or crevices.
- Allow the wax to dry for the recommended time specified by the manufacturer.
- Once dry, use a clean microfiber cloth to buff the wax to a high shine.
By taking the time to dry the rim thoroughly and optionally applying wheel wax, you can ensure that your rims not only look great but are also protected from the elements. This extra step in the cleaning process can prolong the life of your rims and keep them looking their best for longer. So, why not give your rims that extra TLC they deserve and enjoy the benefits of a job well done?